
The safest way to organize a 3D wooden puzzle is to keep most pieces in their numbered sheets until the instructions call for them. Sort the sheets and accessory bags first, create a small tray for the current step, and keep another container for loose parts and useful offcuts. This preserves part numbers, reduces lost pieces and prevents delicate tabs from being damaged in a large mixed pile.
Unlike a traditional jigsaw puzzle, a wooden model is usually assembled in a planned sequence. Sorting every piece by color or shape can remove the numbering system that makes the instructions efficient.
Why should you keep pieces in their wooden sheets?
A numbered sheet is both packaging and an index. When an instruction diagram calls for a specific part, the sheet number and printed outline help you find it without comparing dozens of similar tabs, windows or braces.
Removing every part at the beginning creates several avoidable problems:
- small pieces can be lost or confused with scrap;
- mirrored parts may look almost identical;
- narrow tabs can catch on other pieces and break;
- the connection between a part number and its sheet disappears;
- repeated architectural details become harder to count;
- unfinished parts occupy much more table space.
Leave each part attached until its step is close. If a part falls out while unpacking, place it in a labeled loose-parts tray rather than guessing where it belongs. See how to remove wooden puzzle pieces carefully when a delicate part is ready to release.
What should you do before removing the first piece?
Begin with an inventory. Lay out the wooden sheets in letter or number order, then compare accessory bags, lights and mechanical components with the parts list.
A practical setup includes:
| Area | Purpose |
|---|---|
| Ordered sheet stack | Keeps part numbers easy to locate |
| Current-step tray | Holds only the pieces needed now |
| Loose-parts container | Protects pieces that detach early |
| Tool area | Keeps tweezers, sanding material and other approved tools away from sheets |
| Assembly zone | Provides a flat, uncluttered space for the growing model |
| Instruction stand | Keeps diagrams visible without placing objects on the manual |
Check the instructions for symbols that indicate direction, bending, sanding, wiring or repeated parts. Reading several steps ahead shows whether a piece must be installed now or kept accessible for a later connection. Our guide to reading 3D wooden puzzle instructions explains how to compare diagrams and part orientation.
Photograph the full sheet layout before beginning. The image can help identify an unnumbered part later and provides a quick record of what came with the kit.
Should you sort wooden puzzle pieces by color or shape?
Usually, no—not at the start. Color sorting works well for flat image puzzles, but 3D wooden kits depend more heavily on part numbers, orientation and assembly order.
Instead, organize in layers:
- Keep unused parts in their original numbered sheets.
- Place the parts for the current instruction step in one shallow tray.
- Separate hardware, wiring and decorative accessories by type.
- Move completed subassemblies to a protected area.
- Keep unidentified loose pieces in a labeled container until the instructions reveal them.
Shape becomes useful when the manual shows several similar pieces. Compare the number of tabs, cutouts and curved edges, then confirm the printed part number before fitting anything.
For models with repeated architecture, count the required pieces before assembly. The Big Ben Clock Tower, for example, uses repeated windows and structural sections that reward a clear current-step tray rather than a mixed pile.
How should you release a part from the sheet?
Support the sheet on a clean, flat surface. Press close to each attachment point rather than bending the center of the part. Long, narrow and highly cut pieces should be supported with both hands.
If the part does not release with normal finger pressure, stop and inspect the connection. Use only the tool and method recommended by the instructions. Pulling from one end can turn a long piece into a lever and split it along the wood grain.
After release:
- identify the part number one more time;
- remove only a visible attachment nub if it affects the fit;
- keep sanding minimal and localized;
- place the part in the current-step tray;
- do not stack tools or completed sections on top of unused sheets.
A white or light-colored tray makes tiny dark pieces easier to see. Shallow sides prevent pieces from rolling away without hiding them under one another.
How do you organize an LED or mechanical kit?
LED and mechanical models need separate component zones.
For an LED kit, keep wires, battery boxes, switches and light components away from sanding dust and sharp tools. Do not coil a wire tightly or place heavy sheets on it. Test the lighting at the instruction stage before closing the surrounding structure.
For a mechanical kit, separate axles, spacers, gears and fixed decorative pieces. Parts that look similar may play different roles in controlling distance or friction. Test a moving subassembly before adding the next layer.
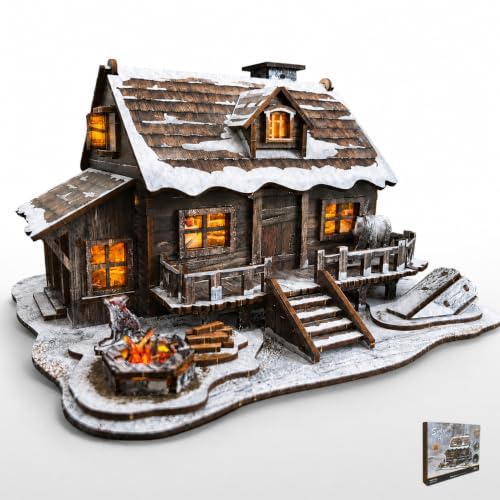
The Paddle Steamer Ship rewards repeated movement checks as its axle and paddle-wheel system comes together. LED models such as the Winter Cabin benefit from a clear wiring area and early light testing.
Our comparison of mechanical and LED 3D wooden puzzles explains how those two building styles differ.
How should you pause and store an unfinished build?
End a session at a clear instruction step whenever possible. Place loose current-step parts in a labeled container, return unused sheets to numerical order and protect completed sections from being crushed. For trays, boxes and resuming after a longer break, see how to store an unfinished 3D wooden puzzle.
Before leaving the table:
- mark the last completed instruction step;
- photograph the model and remaining current-step parts;
- place small parts in a closed tray or bag;
- keep long sheets flat;
- cover the workspace lightly to reduce dust;
- move drinks, pets and direct sunlight away from the build.
Do not place a heavy cover directly on tall walls, roofs or delicate mechanisms. If the project must move, support it from the base and transport loose subassemblies separately.
A five-minute organization routine
Use this routine at the beginning of every building session:
- Clear the assembly zone.
- Put the sheets back in order.
- Read the next three instruction diagrams.
- Remove only the pieces required for the current step.
- Confirm every part number and orientation.
- Move completed work to the protected side of the table.
- Record your stopping point before taking a break.
Organization should reduce searching, not turn the hobby into inventory work. Keep the system simple enough that you will use it throughout the build.
For the complete assembly sequence, continue with our step-by-step guide to building a 3D wooden puzzle.
Frequently asked questions
Should I remove all wooden puzzle pieces before starting?
No. Keep most pieces attached to their numbered sheets until the instructions call for them. This preserves identification and protects delicate parts.
What is the best container for small wooden puzzle pieces?
Use a shallow tray or small container with a lid. A light-colored interior makes tiny pieces visible, and a lid protects them between sessions.
Should I throw away the wooden sheets and offcuts?
Keep sheets and useful offcuts until the model is complete. They help identify missing parts, and a small offcut can be useful for testing sanding or adhesive away from the model.
How do I organize hundreds of repeated pieces?
Work by instruction stage and sheet number. Count only the repeated parts needed for the current subassembly, then leave the rest attached until later.
What should I do with a piece that falls out early?
Place it in a labeled loose-parts container and photograph it next to the sheet if you can identify the opening. Do not force it into a step simply because it looks similar.